
The visual builder is an excellent option to customize our pages when we have little programming knowledge.Divi Builder is an excellent Elegant Themes tool for WordPress. In its new version it allows even to format the contents in the public interface directly, so we can see results on the fly.
The Divi visual builder installs itself like any WordPress plugin. First we go to Plugins, then to Add new and we click on Upload plugin, in the part above. When installed, we activate it to see it in the WordPress Manager.
You will see that the new plugin is called Divi and it has 3 sections: Plugin Options, Divi Library and Divi Functions Editor.
In this edition, we will see how to use the Divi Visual Builder for our content.
Options
In this section we can find the configuration options so that the subscribers of the blog are automatically added to the lists that we have in Mail Marketing services such as Mailchimp. Some providers require using the forms they provide.
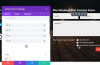
When installing the Divi Visual Builder we will start to see a button above the conventional editor that says Use the Divi constructor, which, when clicked, will impersonate the normal text editor.
An advantage of this option is that you can change from normal editor to Divi without losing the information you already had at that moment.
This editor will show 3 elements: Section, Row within the section and Text module within the row.
Sections
This option allows you to divide the content of the publication into sections, so that we can play with the layout and the elements that we are going to add in our contents.
Standard section
Here we can use all the types of modules that we will find in Divi and the width will depend on the row in which it is located, the theme and the type of page.
Full width section
This section occupies the entire width of the page, they do not have rows configuration.
It allows to introduce modules (one after the other) that are usually used as separators.
Special section
It allows greater customization at the structure level and its use is similar to that of the standard section.
Section settings
In the 3 horizontal lines of the left margin we can get the adjustments. There we will see two sections: General Settings and Custom CSS.
In the General Settings we can customize the design of the section with details such as color, image or background video; Paralax effect or add a CSS identifier.
In the Custom CSS section we can codes for more personalization.
With the Preview button we can preview the adjustments we are making.
Remember to save the changes and click Publish!
Rows
When adding a row in a section, we will have to select the number and proportion of columns to add the modules in that row.
There are many combinations available and multiple rows.
Row settings
It has a few options less than the General settings and custom CSS, but in Advanced design settings we will find many options to customize the margins, backgrounds and configure the behavior of each column separately.
If you lack inspiration, on the original page there are demos that can give you ideas.
Modules
Depending on the functionality, each module will offer different customization options, but these are some of the options you will see: Accordion, Ad, Sidebar, Blog, Audio, Switch, Counter, Circular counters, Bar counters, Slider video, Optin email, Code, Slider, Contact form and Gallery.