
One of the most controversial matters in online marketing is the use of popups to catch subscribers. Some people thinks that they only disturb visitors. But the fact is that popups are really useful to get subscribers.
To create a popup in your WordPress website you’ll need a plugin, but as always, with Divi things are slightly different. Some plugins may not work with Divi, so here we test some of them to show you the best one you can use.
After testing several plugins, we found that Hustle by WPMU DEV is the best one for Divi users.
How to create a popup to catch subscribers using Hustle plugin
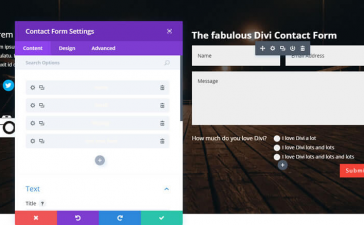
First of all you must download and activate the plugin. If you want to use a contact form plugin to insert into the popup, hustle can be integrated with most of the forms plugin such as Contact Form 7, WP Forms, Ninja Forms and almost all of them. And you can also use the Divi contact form.
If Divi Contact Form not working here you can learn how to fix it.
You can also use popups to grow your mailing list in these mailing services: Aweber, Mailchimp, InfusionSoft, Hubspot, Campaign Monitor, Mailer Lite and all the most popular ones.
This is such an advantage because your subscribers will be added directly into your mailing list.
Follow these steps to create a popup with Hustle Plugin
1_ Create popup
Go to plugins dashboard and click on “create popup”. You will be redirected to popup editor. Here you can set all kind of configuration and customization options to your popup.
You can decide to use a third party plugin for collecting data. In order to do it, you will add a form in the content, just the same way as if you were editing a post.
If you don’t want to use an external form plugin, you have to activate the Email collection module. When this is done, you can select how you want to collect subscribers information.
You can use your mailing service provider or Hustle built-in system. This last option saves data in a CSV file so you can download it later.
2_ Design your new popup
After finishing with the main setups, you can give the popup the appearance you want so it will match with the website looking. In this step you can style popup choosing colors, placing image in different positions, customize borders, shadows and size.
If you have CSS knowledge you will have much more freedom to style the popup since a CSS custom box is available here.
3_ Displaying options
In next section you can choose where and when you want your popup to show up. There are so many options so be sure that the one you want is present.
You can set popup to appear after certain time, on scroll, when users leave or access a specific page, for logged in users, depending on user devices or if they come from a specific page.
You can even select to show popup to users on a Geolocalization condition.
And you can also combine rules, what gives a huge number of amazing possibilities.
4_ Publish your new popup
After finishing configurations, you publish the popup and that’s it. Your popup should be running.
Before publishing, it’s a good idea to use the preview button. Just to be sure everything is ok. You can preview your popup at any time in the creating process.
¿What do you think about popups? ¿Are you already using them in your Website? Please share your thoughts with us leaving a comment and help others to decide.